How to Make Scented Candles at Home
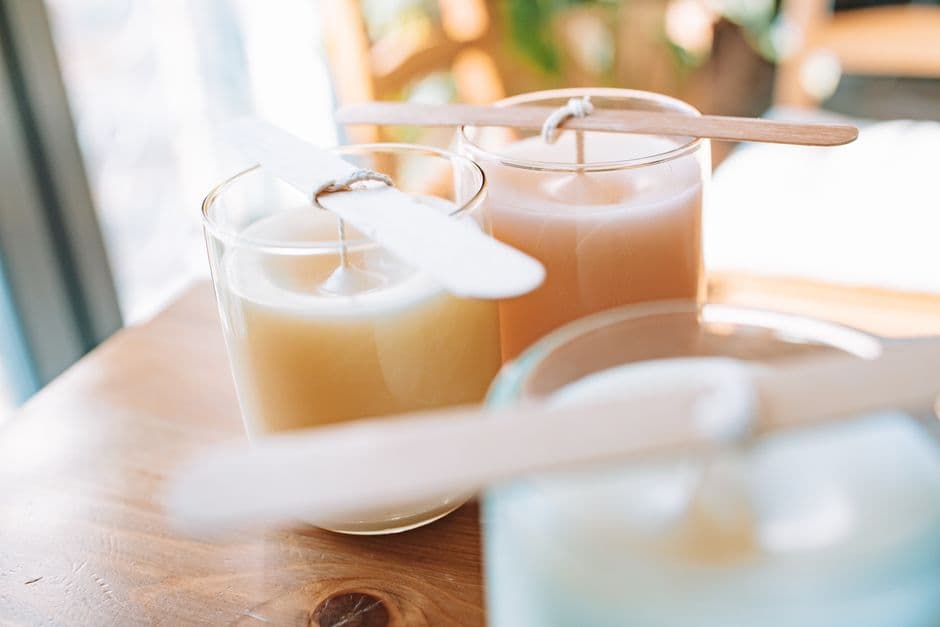
Making scented candles at home is a fun and fulfilling project that allows you to customize fragrances and create a cozy atmosphere. With just a few materials and steps, you can craft beautiful candles tailored to your preferences. This guide will walk you through the essential methods for making your own scented candles, ensuring a successful and enjoyable experience.
📣 Здесь может быть ваша рекламаОставить заявку →1Method 1: Gather Your Materials
- 1
Choose Your Wax Type
Select the right wax for your candles. Common types include:- Paraffin Wax: Easy to find and ideal for beginners.
- Soy Wax: A non-toxic option that burns cleaner.
- Beeswax: Natural and has a subtle honey scent; ideal for a rustic feel.
- 2
Select Your Molds or Containers
Choose containers that will hold your candles. Glass jars, metal tins, or silicone molds work well. Ensure they withstand heat; a typical size is 8-ounce jars for standard candles. - 3
Get Your Wick and Wick Holder
Wicks are critical for candle performance. Use:- Cotton Wicks: Burn steadily without producing soot.
- Wooden Wicks: Create a crackling sound and unique aesthetic.
- 📣 Здесь может быть ваша рекламаОставить заявку →4
Gather Essential Tools
Prepare the necessary tools for candlemaking:- Double boiler or glass measuring cup for melting wax.
- Stirring utensil (wooden or metal).
- Thermometer (preferred temperature is 170°F - 180°F).
- Pouring pitcher for easy wax transfer.
- 5
Choose Your Fragrance Oils
Select candle fragrance oils that you enjoy. Aim for around 1 ounce of fragrance per pound of wax for a strong scent. Popular choices include:- Lavender
- Vanilla
- Cinnamon
- Citrus
2Method 2: Preparing the Candle Mixture
- 1
Melt the Wax
In a double boiler, melt your chosen wax on medium heat, stirring occasionally. Monitor the temperature with your thermometer until it reaches around 170°F - 180°F. This process usually takes 10-15 minutes; never leave it unattended. - 2
Add Fragrance Oil
Once the wax is melted and the temperature is stable, add your fragrance oil. Stir well for about 2 minutes to ensure even distribution. The scent will intensify as it mixes with the hot wax; this step is crucial for a strong fragrance upon burning. - 📣 Здесь может быть ваша рекламаОставить заявку →3
Prepare the Wick
While the wax cools slightly (to around 160°F), secure the wick in the center of your container. Use a wick holder or simply a pencil across the top of the container to keep it centered. - 4
Pour the Wax
Carefully pour the wax into your container, leaving about half an inch at the top. Allow the wick to remain centered as you pour. This step is essential for preventing uneven burning later. - 5
Cool and Set the Candles
Allow the candles to cool completely at room temperature for several hours or overnight. This cooling process helps solidify the wax for a clean finish. Avoid moving them during this time as it could affect the shape.
3Method 3: Finishing Touches
- 1
Trim the Wick
Once cooled, trim the wick to about 1/4 inch above the wax surface. This length will ensure a steady flame and prevent excessive smoke or soot when lighting the candle. - 📣 Здесь может быть ваша рекламаОставить заявку →2
Label Your Candles
For personalization and gifting, create labels for your candles. Include the scent name and date made. This adds a special touch and helps with organization if you make multiple batches. - 3
Store Properly
Store your candles in a cool, dry place away from direct sunlight until you're ready to use them. Ideally, keep them in a box to protect them from dust and damage. This ensures longevity of both scent and quality. - 4
Test Burn
Before gifting or using, perform a test burn on one candle. Light it for a couple of hours to observe how it burns. Check for scent throw and burning behavior to ensure it meets your satisfaction before sharing or using. - 5
Clean Up
Wash your tools and any spills with warm soapy water. Wipe surfaces down to prevent wax residue from hardening on your counter. Proper cleanup sets the stage for your future candle-making endeavors.
4Method 4: Common Mistakes and How to Avoid Them
- 📣 Здесь может быть ваша рекламаОставить заявку →1
Not Measuring Wax and Fragrance Correctly
Ensure you measure wax and fragrance accurately. Using too much fragrance can cause the candle to burn poorly. A good rule is 1 ounce of fragrance for every pound of wax. Don’t exceed 10% fragrance volume to maintain a stable burn. - 2
Pouring Wax at the Wrong Temperature
If wax is poured at too high a temperature, it might cause cracks; too cool can lead to sinkholes. Aim for 160°F - 180°F during pouring for the best results. Using a thermometer helps ensure accuracy. - 3
Using the Wrong Wick Size
Wick size greatly affects how well your candle burns. A wick that is too small will not burn properly and will lead to tunneling, while one that is too large will burn too quickly and create soot. Make sure to match the wick size to your wax type and container size. - 4
Neglecting Safety Precautions
Always use caution when working with hot wax and flame. Work in a well-ventilated area, consider wearing gloves, and keep a fire extinguisher nearby. Never leave melting wax unattended to avoid fire hazards.
💡 Tips
- Experiment with different scent combinations for personalized candles.
- Add color to your wax using candle dyes for a visually appealing effect.
- Use essential oils for more natural scents, but note they might burn differently than fragrance oils.
- If using glass containers, ensure they are tempered for heat safety.
⚠️ Warnings
- Be careful of hot wax to avoid burns.
- Always monitor the melting process to prevent wax from igniting.
- Avoid using food flavorings; they may compromise the scent and burn quality.
Frequently asked questions
What materials do I need to get started with making candles?
To make candles, you will need wax (paraffin, soy, or beeswax), wicks, fragrance oils, containers or molds, and basic tools like a double boiler, thermometer, and stirring utensil.
How long does it take for the candles to set?
Candles usually take several hours to set completely. For best results, allow them to cool overnight in a stable environment.
Can I use kitchen items to make candles?
Yes, you can use kitchen items like measuring cups and spoons, but ensure they are clean and not used for food afterward, especially when dealing with wax and fragrance oils.
How do I ensure my candles smell good when burned?
Using the right amount of fragrance oil is key; aim for 1 ounce per pound of wax and choose high-quality fragrance oils that are designed for candle making.
Is it safe to make candles at home?
Yes, making candles at home is generally safe if you follow standard safety precautions, including working in a well-ventilated area and being cautious with hot wax.