How to Start a Bullet Journal
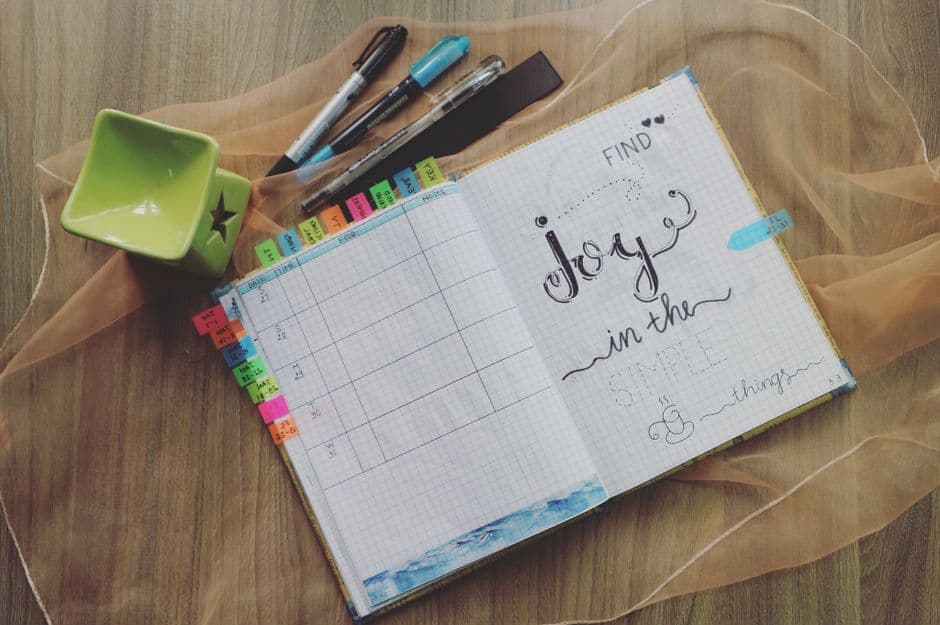
Starting a bullet journal can transform your organization and creativity. It helps you track tasks, set goals, and express yourself through art. This guide will take you through the essential steps to create a personalized bullet journal or BuJo that suits your needs and preferences.
📣 Здесь может быть ваша рекламаОставить заявку →1Step 1: Gather Your Supplies
- 1
Choose a Notebook
The backbone of your bullet journal is the notebook. A dotted notebook is very popular for bullet journaling, as it provides structure but also allows for creativity. A5 size is ideal for portability, while A4 is great for more space. Brands like Leuchtturm1917 or Moleskine are recommended for their quality. - 2
Select Writing Tools
Pick pens that you enjoy writing with. Fine-tipped pens, like the Micron or Staedtler Triplus, work well for neat lettering and small details. Consider colored pens or highlighters for decorations. Remember, you want your journaling experience to be enjoyable and personal. - 3
Add Stencils or Rulers
If you want clean lines and shapes, consider using stencils or a ruler when designing your pages. This can help with creating boxes for daily tasks or habit trackers.
2Step 2: Set Up Your Journal
- 📣 Здесь может быть ваша рекламаОставить заявку →1
Create an Index Page
The index helps you find information quickly. Reserve the first few pages of your journal for an index. Number your pages as you go and jot down the titles of the sections or collections you create. For example, if you have a gratitude page, put "Gratitude" next to its page number in the index. - 2
Add a Key
A key allows you to use symbols to categorize tasks, events, or notes for quick reference. Common symbols include a dot for tasks, a circle for events, and an asterisk for important notes. You can adapt this to any symbols that make sense for you. - 3
Design Future Log
The future log helps you keep track of events or tasks scheduled for upcoming months. Set up a few pages where you write down future tasks and events for a quick glance in the coming months. Use a grid layout to keep everything organized and legible.
3Step 3: Daily and Monthly Logs
- 1
Monthly Log Setup
Create a monthly log at the beginning of each month. This usually includes a calendar or a list of tasks and goals for that month. It helps you visualize what’s coming up. To create a calendar, draw a grid and fill in the dates of the month. Note significant events or tasks below it. - 📣 Здесь может быть ваша рекламаОставить заявку →2
Daily Log Creation
For your daily log, start each day with a new entry that includes tasks, events, and notes for that day. You can decide on the layout; some people prefer a simple list while others enjoy detailed entries. Use checkboxes for tasks to track completion easily. - 3
Track Your Habits and Goals
Consider creating a habit tracker or a goals spread. For a habit tracker, draw a grid where you can mark daily progress. This helps visualize your habits over time. For goals, list your objectives for the month, quarter, or year to stay focused on what you want to achieve.
4Step 4: Add Personal Touches
- 1
Decorate Your Pages
Feel free to express your creativity through decorations. Use washi tape, stickers, or drawings. The great thing about bullet journaling is that it is highly customizable. Just make sure not to overcrowd pages, as it might make the text hard to read. - 2
Experiment with Layouts
Over time, test out different layouts and spreads to see what resonates with you. You can try weekly spreads, meal planners, or even creative prompts. As you learn what works, tailor your journal to better fit your lifestyle and preferences. - 📣 Здесь может быть ваша рекламаОставить заявку →3
Incorporate Inspirational Quotes
Boost your motivation by adding inspirational quotes throughout your journal. Choose quotes that resonate with you personally. You can write them in calligraphy, print them, or simply jot them down-whatever makes you feel good as you go through your journal.
💡 Tips
- Start simple: Avoid the urge to overcomplicate your bullet journal initially-focus on basic setups first and build as you get comfortable.
- Use online resources: Explore Pinterest or Instagram for layout ideas and inspiration to find what suits your style.
- Involve your interests: Incorporate hobbies or themes into your journaling to make it a more enjoyable process.
- Stay consistent: Regularly update your bullet journal to maintain organization and boost its helpfulness.
⚠️ Warnings
- Don’t stress about perfection: Bullet journaling is meant to be personal, so don’t worry if your handwriting or drawings aren’t perfect.
- Avoid obsessing over aesthetics: While creativity is important, the primary goal is functionality. Find a balance that works for you.
- Be cautious with ink: Test your pens on a separate piece of paper to ensure they don’t bleed through, especially with thicker inks.
Frequently asked questions
What are the most essential elements of a bullet journal?
The most essential elements include an index, future log, monthly log, and daily log. These will help you organize tasks, events, and notes effectively.
Can I use any notebook for bullet journaling?
Yes, you can use any notebook, but dotted or grid notebooks are popular because they provide flexibility for drawing layouts while still offering structure.
How often should I update my bullet journal?
Regular updates are recommended, ideally daily or weekly. This keeps your tasks and events current, making it easier to track and manage your goals.
What if I make a mistake in my bullet journal?
Mistakes are part of the creative process! You can either cross it out, use correction fluid, or simply work around it. It’s your journal, and there are no strict rules.
Is bullet journaling time-consuming?
It can be time-consuming initially, but once you establish a rhythm, it often takes just a few minutes a day to maintain.
How can I stay motivated to use my bullet journal?
Incorporating personal interests, setting clear goals, and regularly updating your spreads can help maintain your motivation. Consider community engagement, like following others on social media.